If you’ve ever looked down at your kitchen or bathroom floor and wondered why the grout looks darker, dingier, or just “off” compared to the day the tile was installed, you’re not imagining it. Grout is one of the most overlooked surfaces in the home, and requires special cleaning to maintain its original color. Grout color sealing, on the other hand, is the solution homeowners turn to when standard cleaning just isn’t cutting it.
What Is Grout Color Sealing?
During grout color sealing, a color sealer is applied directly to the grout lines, coating the porous surface of your existing grout with a pigmented, protective barrier. The result is grout that looks uniform in color, resists future staining, and holds up far better against the moisture and grime that cause discoloration.
Traditional grout sealers are clear, penetrating the grout and helping repel liquids, but they don’t do anything to change or restore the color of your grout. A color sealer, on the other hand, does both. It seals the surface and restores or refreshes the color of the grout at the same time. That distinction matters a lot when your grout has already stained, discolored, or faded over time.
Grout Color Sealing Benefits
A color sealer does much more than just giving grout a fresh look. There are real, practical grout color sealing benefits that affect the longevity of your tile, the health of your home, and how much work it takes to keep your floors and walls clean day to day.
Lasting Stain Resistance
The most obvious benefit of color sealing your grout is stain resistance. Once the color sealer is applied to the grout lines and cured, the surface of the grout is much less porous. Spills, cleaning products, and everyday grime don’t penetrate deep into the grout the way they would on an unsealed surface. Instead, they sit on top, where they’re much easier to wipe away before any staining can occur.
This is especially important in kitchens, where grease, food, and beverage spills are constant. It’s also valuable in bathrooms, where soap scum and hard water stains are a daily reality. Color-sealed grout holds up far better in both environments.
Uniform Color That Restores the Look of Your Tile
Discolored grout affects the appearance of a room. When grout lines are patchy, stained, or have faded unevenly, it makes the whole floor or wall look dirty even when it’s clean. Color sealing the grout brings everything back to a uniform color, which immediately refreshes the look of your tile and makes the entire space feel cleaner.
If you’re unhappy with the current grout color, this is also your opportunity to change the color entirely. With a wide range of different color options available in most color sealers, you can pick the color that works best with your tile rather than being locked in to the color of your original or existing grout. That flexibility makes grout color sealing one of the most cost-effective ways to update the appearance of your tile and grout without replacing anything.
Mold and Mildew Protection
Unsealed grout in damp areas like showers and bathroom floors is an open invitation for mold and mildew. Once mold and mildew work their way into porous grout, they’re extraordinarily difficult to remove with surface cleaning alone. A color sealer creates a barrier that keeps moisture from penetrating deep into the grout, dramatically reducing the conditions mold needs to thrive.
This is one of the grout color sealing benefits that directly affects your family’s health. Mold spores in a bathroom or kitchen are a respiratory concern, especially for children, older adults, and anyone with allergies or asthma. Keeping moisture out of your grout lines is a simple, practical step you can take to keep your indoor air cleaner and safer.
Easier Day-to-Day Maintenance
Color-sealed grout is easier to clean. Because the surface isn’t absorbing every liquid it contacts, your routine grout cleaning takes less time and effort. A damp mop and a pH-neutral cleaner are typically all you need to keep color-sealed grout looking great between professional cleanings.
If your grout is currently unsealed, you’ve likely noticed that no matter how hard you scrub, the grout never looks as clean as it did when it was new. That’s not a cleaning product problem. That’s a porosity problem, and a color sealer solves it at the source.
Long-Lasting Results
When properly applied to clean, dry grout, a quality color sealer will last several years. The specific life expectancy of your sealer depends on the traffic the area receives, the cleaning products used, and how well the grout was cleaned and prepped before sealing. In lower-traffic areas, a sealer will last significantly longer. High-traffic kitchens and bathrooms will need reapplication sooner. A good rule of thumb is to check your grout every one to two years and plan accordingly.
How to Seal Grout Color: The Color Sealing Process
It’s important to understand how to seal grout color properly to ensure lasting results. The color sealing process isn’t complicated, but it does require the right preparation, the right product, and a careful application.
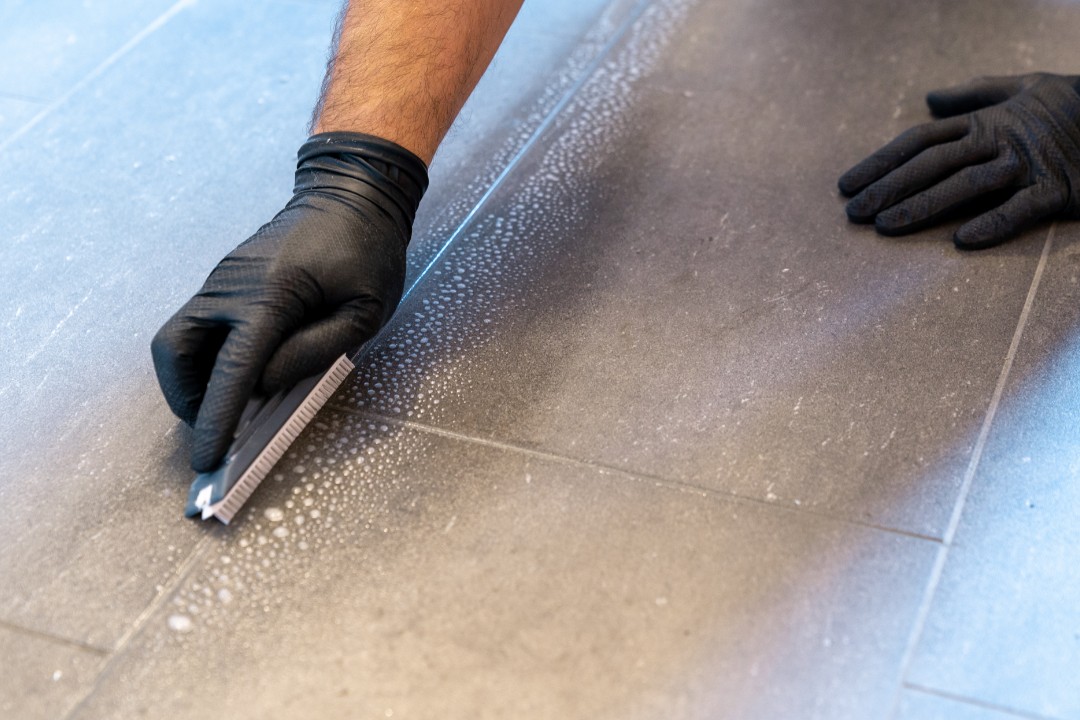
Step 1: Deep Clean the Grout
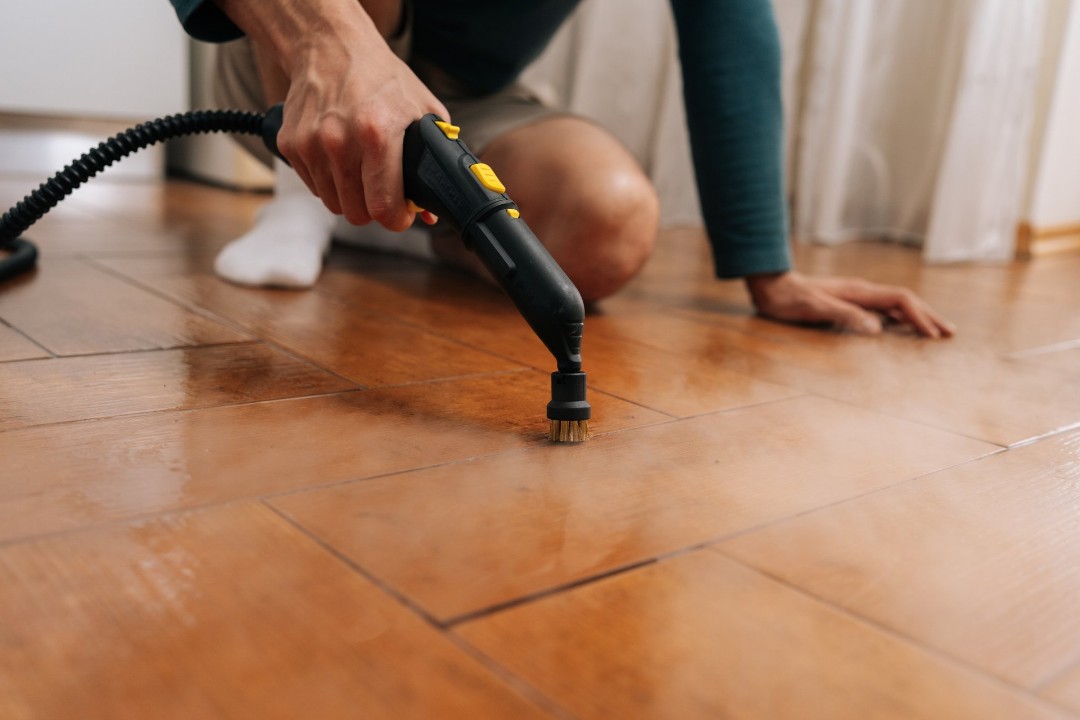
The single most important step before color sealing your grout is a thorough grout cleaning. Any dirt, stain, soap scum, or residue left in the grout lines will be sealed in permanently by the color sealer. That means if you skip proper grout cleaning before sealing, you may lock in stains and grime that can’t be removed afterward without stripping the sealer entirely.
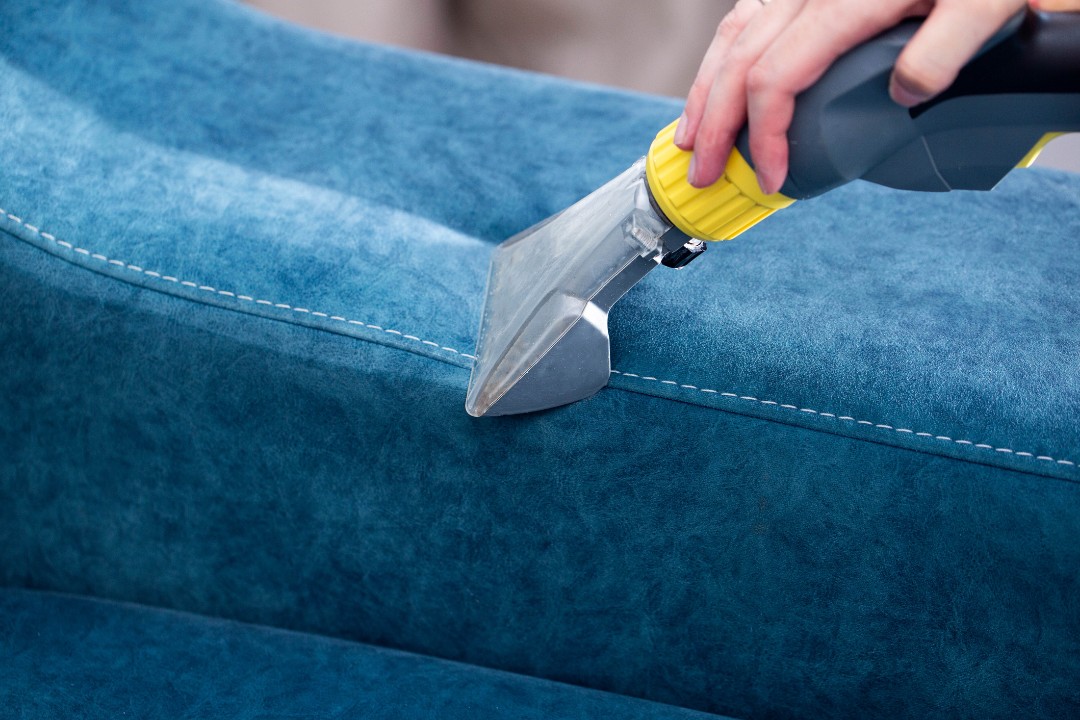
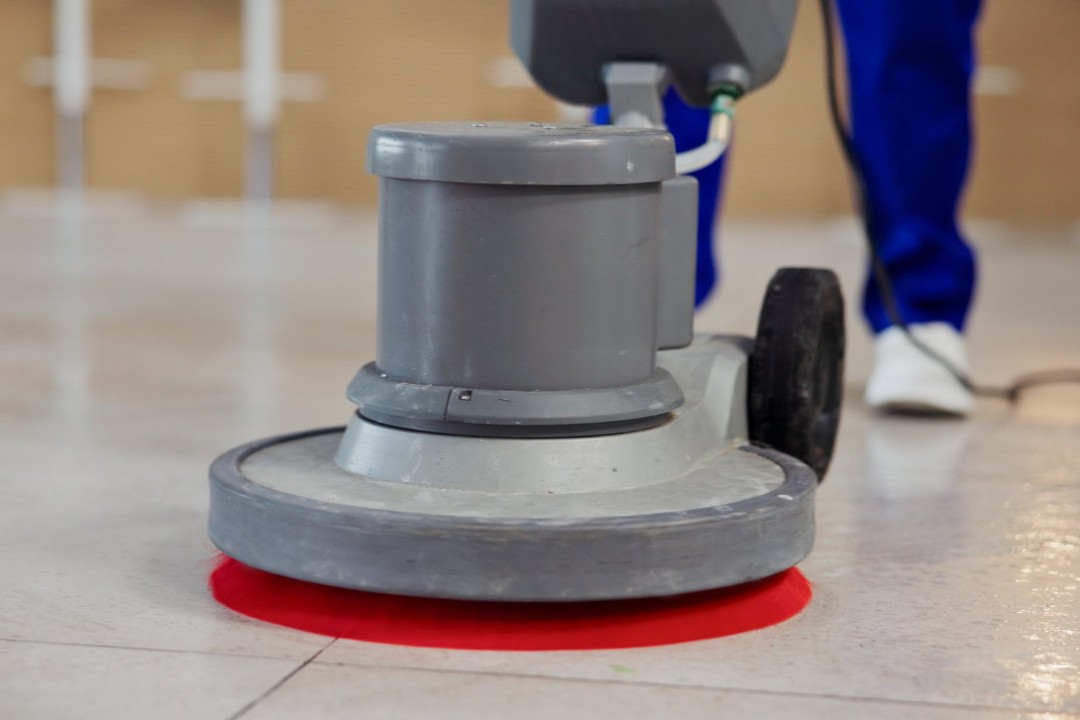
For grout that hasn’t been cleaned in a while, this step often requires more than a standard household cleaner. Embedded grime that has penetrated deep into the grout lines needs a professional tile and grout cleaning service to extract it. Revive Home Services uses high-pressure extraction equipment to pull embedded soils out of your tile and grout before any protective treatment is applied, which is exactly the kind of prep work that gives long-lasting grout color sealing the best possible foundation.
If your grout was sealed in the past but is now dirty or discolored, that’s a clear sign that the old sealer has worn down and grime has worked its way back in. Don’t just reseal on top of dirty grout. Get it professionally cleaned first, then seal. Schedule a tile and grout cleaning with Revive to start the process the right way.
Step 2: Allow the Grout to Dry Completely
After cleaning, your grout needs to dry completely before any color sealer is applied. Moisture trapped in the grout lines prevents the sealer from bonding correctly. Depending on the cleaning method used and the humidity in your home, this can take anywhere from a few hours to a full day.
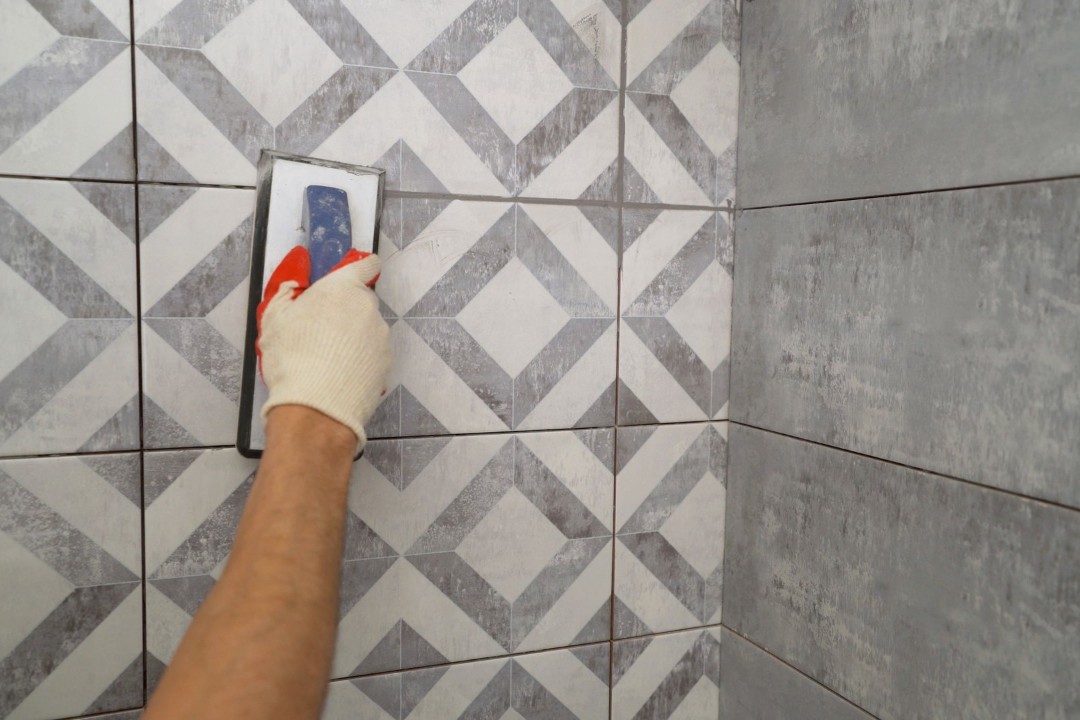
Step 3: Apply the Color Sealer to the Grout Lines
Once the grout is clean and dry, the color sealer is applied directly to the grout lines using a small brush or applicator. The color sealing process requires working carefully to coat the grout evenly while keeping the sealer off the tile surface as much as possible. Most grout color sealers are applied in thin, even coats, and excess product on the tile is wiped away immediately before it has a chance to dry.
Working in small sections helps maintain control over the application and makes it easier to catch drips or missed spots before they dry. The color sealer is applied to the grout lines methodically, section by section, until all surfaces are covered.
Step 4: Allow the Color Sealer to Cure
After the color sealer is applied to the grout lines, it needs time to cure before the surface can be safely exposed to water or foot traffic. Most products specify a curing window of 24 to 72 hours. Rushing this step can compromise the bond and reduce how long the sealer will last, so following the manufacturer’s instructions here is non-negotiable.
Step 5: Inspect the Grout
Once the color sealer has fully cured, inspect your work in good lighting. Look for any missed spots, uneven coverage, or areas where the sealer may have been applied too thin. Touch up as needed. When the color sealing process is complete, your grout should have a uniform, consistent color across all the grout lines with no patchy or faded areas.
Tile Maintenance and Grout Sealing: How to Maintain Results
Color sealing is one of the best investments you can make for the long-term look of your tile, but it’s not a one-and-done solution. Proper tile maintenance and grout sealing starts with good aftercare habits once the sealer has cured.
Grout Sealing Aftercare Tips
These grout sealing aftercare tips will help you maintain clean tiles.
Use pH-neutral cleaning products to clean tile floors or walls. Acidic cleaners like vinegar and bleach-based products degrade the color sealer over time, which shortens how long it lasts and can lead to patchy color. Stick to cleaners specifically formulated for sealed tile and grout.
Wipe up spills as quickly as possible. Even with a color sealer in place, spilled liquids can eventually work their way into any micro-gaps or worn areas. Prompt cleanup is the single easiest aftercare tip to follow and one of the most effective ways to protect your color seal long-term.
Avoid abrasive scrubbing pads or stiff wire brushes on your sealed grout lines. These can scratch and erode the sealer surface, leading to early wear in the areas you clean most often. Soft-bristle brushes and microfiber mops are ideal for routine maintenance.
Reseal on schedule. Even a high-quality sealer will break down over time. Most color sealers need to be reapplied every two to five years depending on use, moisture exposure, and cleaning habits. Considering doing periodic inspections of sealed surfaces to catch wear before significant deterioration sets in. When your grout starts to stain more easily again or looks uneven, that’s your signal that the current sealer is nearing the end of its effective life.
Schedule Professional Tile and Grout Cleaning in Between Color Sealing
Even perfectly color-sealed grout will benefit from professional tile and grout cleaning periodically. Over time, surface grime builds up on top of the sealer, and professional cleaning removes that layer before it has a chance to break down the sealer’s surface through chemical or abrasive action. As noted in Revive’s guide to common tile cleaning mistakes to avoid, using the wrong cleaning methods is one of the fastest ways to compromise both your tile and your grout protection.
If your grout is sealed but has started looking dirty, discolored, or dull, don’t assume the sealer has failed. In many cases, a professional tile and grout cleaning service can restore the look of your tile grout without the need to strip and reapply the sealer. Schedule a cleaning with Revive Home Services to find out what’s possible before assuming your grout needs to be resealed.
Revive Your Tile, Starting with a Professional Clean
Your tile and grout are worth protecting. Whether you’ve recently had your grout color sealed and want to keep it looking great, or your grout is dirty and discolored and you’re preparing for a color sealing project, the first step is cleaning.
At Revive Home Services, we provide tile and grout cleaning services using advanced high-pressure extraction to remove the embedded grime, bacteria, and staining that household cleaning can’t reach.
Read more about what professional tile and grout care can do for your home in our article on how to protect grout from stains after professional cleaning, or learn about how hard water stains damage tile and grout over time.
Your floors deserve the best. Schedule your tile and grout cleaning online today.